Oh no! Chocolate has met your car seat! We've all been there – a rogue piece of candy, a melty ice cream cone, or a forgotten chocolate bar can leave a sticky, messy surprise on your car's interior. Don't panic! Removing chocolate from a car seat might seem daunting, but with the right tools and techniques, you can restore your car seat to its former glory. This guide will walk you through the process step-by-step, ensuring a chocolate-free ride every time. How to Remove Chocolate Stains from Car Seats : A Comprehensive Guide Getting chocolate out of your car seat involves a multi-pronged approach, addressing both the solid residue and the greasy stain it leaves behind. The sooner you tackle the stain, the easier it will be to remove. Remember to always test any cleaning solution on an inconspicuous area of the car seat first to ensure it doesn't damage or discolor the fabric. Step 1: Gather Your Supplies for Chocolate Removal Before you ...
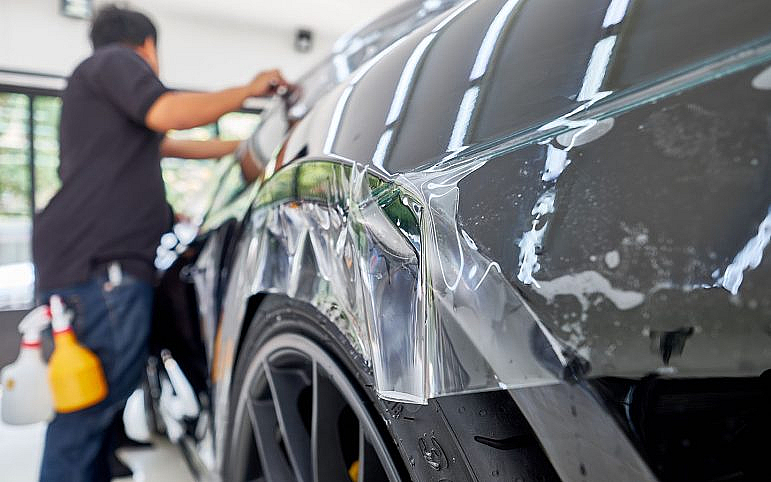
So, you've taken the plunge and wrapped your car. Awesome choice! It looks fantastic, right? But now comes the big question: how do you keep that sleek, vibrant look without damaging the wrap? Don't worry, it's not rocket science. Washing a wrapped car is a bit different from washing a car with regular paint, but with the right techniques and products, you can keep your wrap looking its best for years to come. Let's dive in and learn how to properly wash your wrapped car!
Understanding Wrapped Car Care: Why it Matters
Before we jump into the how-to, let's talk about why special care is needed. Vehicle wraps, whether they're full color changes or intricate designs, are made of vinyl. This vinyl, while durable, is more susceptible to damage from harsh chemicals, abrasive materials, and aggressive washing techniques compared to automotive paint. Improper washing can lead to:
- Fading: Sunlight and harsh chemicals can cause the colors in your wrap to fade over time.
- Scratching: Abrasive materials can easily scratch the surface of the vinyl.
- Lifting: High-pressure washing or harsh chemicals can cause the edges of the wrap to lift.
- Cracking: Extreme temperatures and improper cleaning can lead to cracking.
Therefore, knowing how to wash car wrap properly is paramount. By understanding these risks and following the guidelines below, you'll ensure your investment stays protected and your car continues to turn heads for the right reasons. Think of it like this: your car wrap is a delicate piece of art that needs gentle care. The better you care for it, the longer it will last and the more impressive it will look.
Essential Supplies for Washing a Wrapped Vehicle
Gathering the right supplies is half the battle when it comes to safely washing a wrapped car. You'll want to avoid anything too abrasive or harsh. Here's a list of what you'll need:
- p H-Neutral Car Wash Soap: This is the most critical item. Choose a soap specifically designed for car wraps or one that is explicitly labeled as p H-neutral. Avoid soaps with waxes or silicone, as they can build up on the wrap and make it difficult to clean. Brands like Chemical Guys, Adam's Polishes, and 303 Products offer excellent p H-neutral options.
- Two Buckets: One bucket for soapy water and one for clean rinse water. This prevents you from constantly reintroducing dirt and grime back onto the wrap.
- Microfiber Wash Mitts: Microfiber is soft and gentle on the wrap's surface. Avoid using sponges or terry cloth towels, as they can trap dirt and scratch the vinyl. Get multiple mitts so you can switch to a clean one if you drop it or if it gets too dirty.
- Microfiber Drying Towels: These are super absorbent and won't scratch the wrap. Look for plush, high-pile microfiber towels.
- Detailing Spray (Optional): A wrap-specific detailing spray can help remove water spots and add a layer of protection after washing.
- Soft-Bristled Brush (Optional): Useful for cleaning hard-to-reach areas like around emblems and in crevices.
- Garden Hose with a Gentle Spray Nozzle: Avoid high-pressure nozzles, as they can damage the wrap.
The key here is to use gentle tools and chemicals. Remember, prevention is better than cure. Taking the time to gather the right supplies will save you from potential damage and headaches down the road. Investing in quality products ensures your wrap remains vibrant and undamaged for a longer period.
Step-by-Step Guide: How to Wash a Wrapped Car Correctly
Now for the main event! Follow these steps carefully to safely and effectively wash your wrapped car:
- Pre-Rinse: Thoroughly rinse the entire car with a gentle stream of water to remove loose dirt and debris. Start from the top and work your way down. This is an important step to prevent scratching, as it removes the larger particles that could get trapped in your wash mitt.
- Two-Bucket Wash: Fill one bucket with warm water and your p H-neutral car wash soap, following the manufacturer's instructions for dilution. Fill the other bucket with clean water. Dip your microfiber wash mitt into the soapy water, wring out the excess, and gently wash a small section of the car using straight, overlapping motions. Avoid circular motions, as they can swirl dirt and create scratches.
- Rinse the Mitt: After washing a section, rinse the mitt thoroughly in the clean water bucket to remove any dirt or grime. Wring out the excess water before dipping it back into the soapy water. This keeps your soapy water clean and prevents you from reintroducing dirt onto the wrap.
- Wash in Sections: Continue washing the car in sections, rinsing the mitt frequently, until the entire car is clean.
- Rinse Thoroughly: Once you've washed the entire car, rinse it thoroughly with a gentle stream of water to remove all traces of soap. Again, start from the top and work your way down. Make sure to get into all the crevices and around emblems to ensure no soap residue remains.
- Dry with Microfiber Towels: Immediately dry the car with clean, dry microfiber drying towels. Use a blotting motion rather than wiping to avoid creating swirl marks. You can also use a leaf blower or compressed air to remove water from hard-to-reach areas.
- Detailing Spray (Optional): If desired, apply a wrap-specific detailing spray to add a layer of protection and remove any remaining water spots. Follow the manufacturer's instructions for application.
Remember, patience is key. Don't rush the process. Take your time and pay attention to detail. With a little effort, you can achieve a professional-looking clean without damaging your wrap.
Avoiding Common Mistakes When Washing a Wrapped Car
Even with the best intentions, it's easy to make mistakes when washing a wrapped car. Here are some common pitfalls to avoid:
- Using Automatic Car Washes: These are a big no-no. The harsh brushes and chemicals can severely damage the wrap.
- Using High-Pressure Washers Too Closely: While a pressure washer can be used, keep the nozzle at least 12 inches away from the wrap and use a wide fan spray. Avoid aiming the nozzle directly at the edges of the wrap, as this can cause them to lift.
- Using Abrasive Cleaners: Avoid using cleaners with harsh chemicals, solvents, or abrasives. Always test a small, inconspicuous area first before applying any new cleaner to the entire wrap.
- Washing in Direct Sunlight: Washing in direct sunlight can cause the soap to dry too quickly, leaving water spots. Wash in the shade or on a cloudy day.
- Neglecting the Edges: Pay special attention to the edges of the wrap, as they are most susceptible to lifting. Gently clean and dry these areas to prevent them from peeling.
By being aware of these potential pitfalls, you can avoid costly mistakes and keep your wrap looking its best for years to come. Regular and careful washing is the key to maintaining the vibrancy and integrity of your investment.
Maintaining Your Wrapped Car's Shine: Additional Tips
Washing is just one part of maintaining your wrapped car. Here are a few additional tips to keep it looking its best:
- Regular Washing: Wash your car regularly, ideally every 1-2 weeks, to prevent dirt and grime from building up.
- Protect from the Sun: Park your car in the shade whenever possible to protect the wrap from fading.
- Use a Car Cover: If you park your car outside, consider using a car cover to protect it from the elements.
- Remove Contaminants Promptly: Bird droppings, tree sap, and bug splatters can damage the wrap if left on for too long. Remove them as soon as possible with a wrap-specific cleaner or detailing spray.
- Consider a Ceramic Coating: Applying a ceramic coating specifically designed for vinyl wraps can provide added protection from UV rays, scratches, and stains.
- Inspect Regularly: Periodically inspect the wrap for any signs of damage, such as lifting, cracking, or fading. Address any issues promptly to prevent them from worsening.
Think of your car wrap as an investment. With proper care and maintenance, it can last for years and keep your car looking its best. By following these tips and techniques, you'll not only keep your car looking great but also protect your investment and enjoy the benefits of a beautifully wrapped vehicle for a long time. Remember, a little effort goes a long way in preserving the life and luster of your car wrap.