Oh no! Chocolate has met your car seat! We've all been there – a rogue piece of candy, a melty ice cream cone, or a forgotten chocolate bar can leave a sticky, messy surprise on your car's interior. Don't panic! Removing chocolate from a car seat might seem daunting, but with the right tools and techniques, you can restore your car seat to its former glory. This guide will walk you through the process step-by-step, ensuring a chocolate-free ride every time. How to Remove Chocolate Stains from Car Seats : A Comprehensive Guide Getting chocolate out of your car seat involves a multi-pronged approach, addressing both the solid residue and the greasy stain it leaves behind. The sooner you tackle the stain, the easier it will be to remove. Remember to always test any cleaning solution on an inconspicuous area of the car seat first to ensure it doesn't damage or discolor the fabric. Step 1: Gather Your Supplies for Chocolate Removal Before you ...
Is your car overheating, even though the temperature gauge reads normal? Are you hearing gurgling noises coming from under the dashboard? These could be signs that air is trapped in your car's cooling system, and it's time to bleed your radiator! Don't worry, it's a task most DIYers can tackle with a little know-how and some basic tools. Let's get started!
Why Bleeding Your Car Radiator is Important
The cooling system in your car is a closed loop that circulates coolant (a mixture of water and antifreeze) to regulate the engine's temperature. Over time, air can get trapped in this system. This trapped air can create several problems, reducing the efficiency of your engine and potentially leading to costly repairs. By bleeding the radiator, you're essentially removing this trapped air, allowing the coolant to flow freely and do its job effectively.
Symptoms of Air in Your Car's Cooling System
Knowing the signs that air is trapped in your cooling system is the first step to identifying the problem. Here are some common symptoms to watch out for:
- Overheating Engine: This is perhaps the most obvious sign. Air pockets prevent proper coolant circulation, leading to increased engine temperature.
- Erratic Temperature Gauge: The temperature gauge may fluctuate wildly, sometimes reading normal and other times spiking into the red zone.
- Gurgling Noises: You might hear gurgling or bubbling sounds coming from the dashboard or engine compartment, especially after starting the car. This is the sound of air moving through the system.
- Poor Heater Performance: If your heater isn't blowing hot air, even when the engine is warm, it could be due to air blocking the flow of coolant to the heater core.
- Coolant Leaks: In some cases, trapped air can contribute to increased pressure in the cooling system, leading to leaks in hoses, the radiator, or other components.
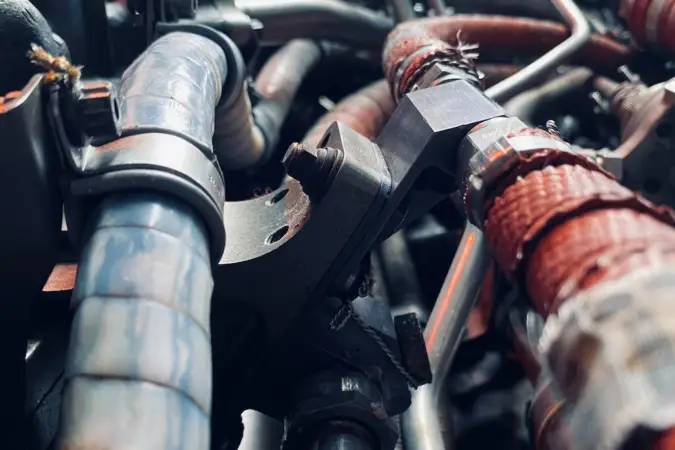
Tools and Materials Needed to Bleed a Car Radiator
Before you start, gather the following tools and materials. Having everything on hand will make the process smoother and more efficient:
- Safety Glasses: Protect your eyes from splashing coolant.
- Gloves: Coolant can be harmful to your skin, so wear gloves to protect your hands.
- Wrench or Screwdriver: To open the radiator cap and bleed valve (if equipped). The size will vary depending on your vehicle.
- Coolant: You may lose some coolant during the bleeding process, so have some extra coolant (the correct type for your vehicle) on hand to top it off.
- Funnel: To help add coolant without spilling.
- Drain Pan: To catch any coolant that spills when bleeding the radiator.
- Rags or Shop Towels: For cleaning up any spills or drips.
- Owner's Manual: Refer to your owner's manual for specific instructions and the location of the bleed valve on your vehicle.
Step-by-Step Guide: How to Bleed Your Car Radiator
Now, let's dive into the process of bleeding your car's radiator. Follow these steps carefully for a safe and effective job. Remember, safety first! Always work on a cool engine to avoid burns from hot coolant or engine parts.
Step 1: Ensure the Engine is Cool
This is absolutely crucial! Never attempt to bleed the radiator when the engine is hot. Hot coolant is under pressure and can cause serious burns if released suddenly. Allow the engine to cool completely before starting the process. Ideally, let it sit for several hours or overnight.
Step 2: Locate the Radiator Cap and Bleed Valve (If Equipped)
The radiator cap is usually located on top of the radiator itself. The bleed valve (also known as an air bleeder valve) is a small valve, often made of plastic or brass, that is located at the highest point of the cooling system. It may be on the radiator, the thermostat housing, or a coolant hose. Check your owner's manual if you're unsure of its location. Some vehicles do not have a dedicated bleed valve, and the radiator cap acts as the only point for releasing air.
Step 3: Open the Radiator Cap Carefully
Wrap a thick rag around the radiator cap and slowly open it. This will release any residual pressure in the system. Turn the cap slowly and listen for a hissing sound. Once the pressure is released, you can remove the cap completely. Never remove the cap if the engine or radiator is hot to the touch!
Step 4: Locate and Open the Bleed Valve (If Equipped)
If your vehicle has a bleed valve, attach a small hose to the valve to direct any coolant that comes out into the drain pan. Use a wrench or screwdriver to slowly open the bleed valve. You should hear a hissing sound as air escapes. If only coolant comes out immediately, that's a good sign, but let it flow for a few seconds to ensure all the air is purged.
Important Note: Don't completely remove the bleed valve. Just loosen it enough to allow air and coolant to escape.
Step 5: Add Coolant to the Radiator
With the radiator cap open (and the bleed valve open, if equipped), slowly add coolant to the radiator until it's full. Use a funnel to avoid spills. Keep an eye on the bleed valve. When a steady stream of coolant (without any air bubbles) starts coming out of the bleed valve, close the valve securely.
Step 6: Start the Engine and Let it Run
With the radiator cap still off, start the engine and let it idle. Keep an eye on the coolant level in the radiator. As the engine warms up, the coolant level may drop as air bubbles are purged from the system. Add more coolant as needed to keep the radiator full.
Step 7: Watch for Air Bubbles
While the engine is idling, watch for air bubbles coming out of the radiator. You may need to gently rev the engine a few times to help dislodge any trapped air. Continue adding coolant as needed. If your car has a bleed valve, also monitor that again for more air to come out, repeating step 4 and 5 if needed.
Step 8: Replace the Radiator Cap
Once you no longer see air bubbles coming out of the radiator and the coolant level remains stable, carefully replace the radiator cap. Make sure the cap is tightened securely.
Step 9: Check the Coolant Overflow Tank
The coolant overflow tank (also known as the expansion tank) is a plastic reservoir connected to the radiator. It's designed to collect excess coolant that overflows from the radiator when the engine is hot. Check the coolant level in the overflow tank and add coolant as needed to bring it up to the "full" mark. Many tanks have a "cold fill" line and a "hot fill" line. Refer to your car's manual for proper fill level.
Step 10: Monitor the Engine Temperature
After bleeding the radiator and replacing the cap, take your car for a short test drive. Keep a close eye on the temperature gauge to ensure that the engine temperature remains within the normal range. If the engine starts to overheat, pull over immediately and let it cool down before checking the coolant level again.
When to Seek Professional Help
While bleeding your car's radiator is a relatively straightforward task, there are situations where it's best to seek professional help. If you're uncomfortable working on your car's cooling system, or if you've tried bleeding the radiator and the overheating problem persists, it's time to take your car to a qualified mechanic.
Here are some scenarios where professional help is recommended:
- Persistent Overheating: If bleeding the radiator doesn't solve the overheating problem, there may be an underlying issue, such as a faulty thermostat, a clogged radiator, or a blown head gasket.
- Coolant Leaks: If you notice coolant leaks, it's important to have them repaired promptly to prevent further damage to the engine.
- Complex Cooling Systems: Some cars have more complex cooling systems with multiple bleed valves or electronically controlled components. These systems may require specialized tools and knowledge to diagnose and repair.
- Lack of Experience: If you're not comfortable working on your car, it's always best to leave the job to a professional. Working on the cooling system incorrectly can lead to further damage and potentially dangerous situations.
Preventative Maintenance Tips to Minimize Air in the Radiator
Prevention is always better than cure. Here are some preventative maintenance tips to minimize the chance of air getting into your cooling system:
- Regular Coolant Flushes: Follow the manufacturer's recommended coolant flush intervals. Over time, coolant can become contaminated and lose its effectiveness, leading to corrosion and the formation of air pockets.
- Use the Correct Coolant Type: Always use the coolant type specified in your owner's manual. Using the wrong coolant can damage the cooling system components.
- Inspect Hoses and Clamps: Regularly inspect the coolant hoses and clamps for signs of wear, cracks, or leaks. Replace any damaged components promptly.
- Check the Radiator Cap: Ensure the radiator cap is in good condition and seals properly. A faulty radiator cap can allow air to enter the system.
- Monitor Coolant Levels: Regularly check the coolant level in the radiator and overflow tank. Add coolant as needed to maintain the proper level.
Troubleshooting Common Problems
Sometimes, even after carefully following all the steps, you may encounter some problems. Here are some common issues and how to address them:
- Bleed valve is stuck: Use penetrating oil and let it sit for a few minutes before trying again. If it still doesn't budge, consider replacing the valve.
- Coolant keeps overflowing: This could indicate a more serious problem, such as a blown head gasket. Seek professional help.
- Still hearing gurgling noises: Repeat the bleeding process. It may take multiple attempts to remove all the air.
- Engine still overheating: Check for other potential causes, such as a faulty thermostat or a clogged radiator.
By following these steps and tips, you can successfully bleed your car's radiator and keep your engine running cool and efficiently. Remember to prioritize safety and consult a professional if you're unsure about any part of the process. Happy motoring!