Oh no! Chocolate has met your car seat! We've all been there – a rogue piece of candy, a melty ice cream cone, or a forgotten chocolate bar can leave a sticky, messy surprise on your car's interior. Don't panic! Removing chocolate from a car seat might seem daunting, but with the right tools and techniques, you can restore your car seat to its former glory. This guide will walk you through the process step-by-step, ensuring a chocolate-free ride every time. How to Remove Chocolate Stains from Car Seats : A Comprehensive Guide Getting chocolate out of your car seat involves a multi-pronged approach, addressing both the solid residue and the greasy stain it leaves behind. The sooner you tackle the stain, the easier it will be to remove. Remember to always test any cleaning solution on an inconspicuous area of the car seat first to ensure it doesn't damage or discolor the fabric. Step 1: Gather Your Supplies for Chocolate Removal Before you ...
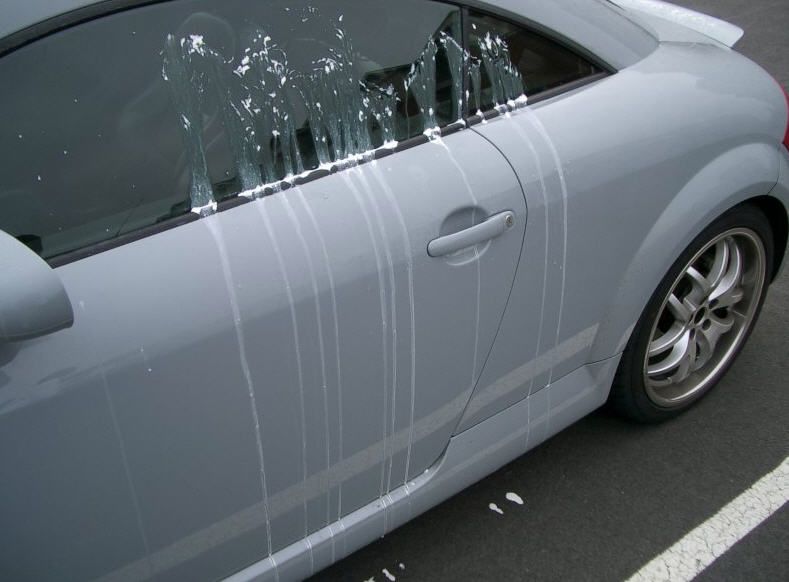
Finding egg splattered across your car can be incredibly frustrating, not just because it's messy but also because it can seriously damage your paint job if left unattended. You're probably thinking, "How am I going to get this egg off my car without making things worse?" Don't worry, you're not alone! Many car owners face this sticky situation. Thankfully, with the right knowledge and a few common household items, you can safely and effectively remove egg from your car's surface and protect its finish. Let's dive in!
The Urgency: Why You Need to Remove Egg From Your Car Immediately
Why is it so important to act fast when you find egg on your car? The key lies in the composition of an egg. Egg whites and yolks contain proteins that, as they dry, can bond strongly to your car's paint. This bond isn't just superficial; it can actually etch into the clear coat and even the paint itself. Think of it like this: the longer the egg sits, the deeper it digs in. The sun's heat exacerbates this process, essentially baking the egg onto your car's surface. This baked-on egg becomes much harder to remove and requires more aggressive cleaning methods, increasing the risk of scratches and swirl marks.
Furthermore, decomposing egg attracts bacteria and can create unpleasant odors that will linger. The sulfur compounds released during decomposition are particularly corrosive and can accelerate the paint damage. Delaying the cleaning process allows these corrosive substances to actively degrade your car's finish. The effects of leaving egg residue on your car can range from unsightly blemishes to permanent damage requiring professional repair. Therefore, immediate removal is paramount to preserving the integrity of your vehicle's paintwork and preventing costly repairs.
Essential Tools and Materials for Egg Removal
Before you begin the egg removal process, gather the necessary tools and materials. Having everything ready will streamline the cleaning and minimize the risk of causing further damage. Here's a list of essentials:
- Water: A hose or bucket of clean, lukewarm water is crucial for rinsing and softening the egg residue.
- Microfiber Towels: These are essential for gentle cleaning and drying. Avoid using abrasive cloths that can scratch the paint.
- Car Wash Soap: A p H-balanced car wash soap is specifically formulated to clean car surfaces without stripping the wax or damaging the clear coat.
- Spray Bottle: A spray bottle is useful for applying cleaning solutions directly to the affected area.
- Plastic Scraper (Optional): A plastic scraper can help gently lift stubborn egg residue without scratching the paint. Avoid metal scrapers at all costs.
- Detailing Clay (Optional): For particularly stubborn or baked-on egg residue, detailing clay can help remove embedded contaminants.
- Car Wax or Sealant (Optional): After cleaning, applying a coat of wax or sealant will help protect the paint and restore its shine.
Step-by-Step Guide: How to Get Egg Off Your Car Safely
Now, let's get down to the actual process of removing the egg. Follow these steps carefully to ensure you clean your car without causing any damage.
Step 1: Initial Rinse
The first step is to thoroughly rinse the affected area with lukewarm water. This will help to loosen the egg residue and remove any loose debris. Use a hose with a gentle spray nozzle to avoid applying excessive pressure that could scratch the paint. Pay particular attention to crevices and hard-to-reach areas where egg residue may have accumulated. The goal is to soften the egg and make it easier to remove in the subsequent steps.
Step 2: Soap and Water Application
Mix car wash soap with water according to the manufacturer's instructions. Apply the soapy water liberally to the affected area using a soft sponge or microfiber wash mitt. Gently agitate the soapy water to loosen the remaining egg residue. Avoid scrubbing aggressively, as this can scratch the paint. Allow the soapy water to dwell on the surface for a few minutes to further soften the egg. The soap helps break down the proteins in the egg, making it easier to lift away from the paint.
Step 3: Gentle Cleaning and Scraping (If Needed)
Using a clean microfiber towel, gently wipe the affected area in a circular motion. If there are stubborn spots of egg residue that won't come off with wiping, carefully use a plastic scraper to lift them away. Hold the scraper at a shallow angle to the paint and apply gentle pressure. Avoid digging the scraper into the paint, as this can cause scratches. Continue wiping with the microfiber towel to remove any remaining residue. Remember to regularly rinse the microfiber towel to prevent it from becoming saturated with egg residue and potentially scratching the paint.
Step 4: Final Rinse and Drying
Once you've removed all the egg residue, thoroughly rinse the area with clean water to remove any remaining soap. Use a clean, dry microfiber towel to dry the surface. Pat the surface dry rather than wiping, as this will minimize the risk of swirl marks. Ensure the area is completely dry to prevent water spots from forming. Inspect the area carefully to ensure that all traces of egg residue have been removed.
Step 5: Inspection and Optional Clay Bar Treatment
After drying, carefully inspect the area for any remaining residue or etching. If you notice any stubborn spots or discoloration, you can use a detailing clay bar to remove embedded contaminants. Detailing clay is a mild abrasive that safely removes surface contaminants without scratching the paint. Follow the manufacturer's instructions for using the clay bar. After using the clay bar, rewash and dry the area.
Step 6: Waxing or Sealing
To protect your car's paint and restore its shine, apply a coat of car wax or sealant to the cleaned area. Wax and sealant provide a protective barrier against the elements and help prevent future damage. Follow the manufacturer's instructions for applying the wax or sealant. Buff the surface with a clean microfiber towel to achieve a glossy finish. This final step will ensure that your car's paint is protected and looks its best.
Alternative Cleaning Solutions for Egg Removal
While car wash soap is generally the best option for removing egg from your car, there are some alternative cleaning solutions that you can use if you don't have car wash soap on hand. However, it's important to use these solutions with caution and test them on an inconspicuous area of your car first to ensure they don't damage the paint.
- Vinegar and Water Solution: A mixture of equal parts white vinegar and water can help dissolve egg residue. Apply the solution to the affected area, let it sit for a few minutes, and then wipe it clean with a microfiber towel. Rinse thoroughly with water.
- Baking Soda Paste: A paste made from baking soda and water can be used to gently scrub away stubborn egg residue. Apply the paste to the affected area, let it sit for a few minutes, and then gently scrub with a microfiber towel. Rinse thoroughly with water. Be careful not to scrub too hard, as baking soda can be abrasive.
- Dish Soap: While dish soap is effective at removing grease and grime, it can also strip the wax from your car's paint. If you use dish soap, be sure to re-wax your car afterwards. Dilute the dish soap with water and apply it to the affected area. Gently scrub with a microfiber towel and rinse thoroughly with water.
Preventing Future Egg Attacks
While you can't always prevent someone from egging your car, there are some steps you can take to minimize the risk. Parking your car in a garage or under a carport can protect it from vandals. Installing security cameras can deter potential egg-throwers. If you live in an area where egging is common, consider investing in a car cover. A car cover will protect your car's paint from egg damage and make it easier to clean.
When to Call a Professional
In some cases, the egg damage may be too severe for you to handle on your own. If the egg has been left on your car for an extended period of time and has caused significant etching or discoloration, it's best to call a professional detailer. Professional detailers have the tools and expertise to safely remove stubborn egg residue and restore your car's paint to its original condition. They can also apply protective coatings to prevent future damage. Don't hesitate to seek professional help if you're unsure about how to proceed or if you're worried about damaging your car's paint.
Dealing with egg on your car can be frustrating, but by following these steps, you can safely and effectively remove the egg and protect your car's finish. Remember to act quickly, use the right tools and materials, and be gentle during the cleaning process. With a little patience and effort, you can restore your car to its former glory!