Oh no! Chocolate has met your car seat! We've all been there – a rogue piece of candy, a melty ice cream cone, or a forgotten chocolate bar can leave a sticky, messy surprise on your car's interior. Don't panic! Removing chocolate from a car seat might seem daunting, but with the right tools and techniques, you can restore your car seat to its former glory. This guide will walk you through the process step-by-step, ensuring a chocolate-free ride every time. How to Remove Chocolate Stains from Car Seats : A Comprehensive Guide Getting chocolate out of your car seat involves a multi-pronged approach, addressing both the solid residue and the greasy stain it leaves behind. The sooner you tackle the stain, the easier it will be to remove. Remember to always test any cleaning solution on an inconspicuous area of the car seat first to ensure it doesn't damage or discolor the fabric. Step 1: Gather Your Supplies for Chocolate Removal Before you ...
That sickening screech of metal on metal. The sinking feeling in your stomach as you realize you've just brushed up against another car, a pole, or even a rogue shopping cart. Then comes the dreaded inspection, and there it is: paint transfer, a colorful reminder of your unfortunate encounter. But don't panic! Removing paint transfer from your car is often something you can tackle yourself with a little patience and the right techniques. Let's explore how to get rid of those unsightly marks and restore your car's pristine look.
Understanding Paint Transfer on Your Car
Before diving into the "how-to," it's essential to understand what paint transfer actually is. It's not a scratch or a gouge in your car's paint. Instead, it's a layer of paint from another object that has adhered to the surface of your vehicle. Think of it like a colorful stain on your car's clear coat. The severity of the paint transfer can vary depending on factors like:
- The speed of impact: Higher speeds usually result in more extensive transfer.
- The type of paint involved: Some paints are more prone to transfer than others. Softer paints, commonly found on older vehicles, will transfer easier compared to more advanced ceramic coatings found on modern cars.
- The pressure of impact: A hard, direct impact will cause more transfer compared to a glancing blow.
- The condition of your car's paint: A well-maintained paint surface with a good layer of wax or sealant will offer more protection against paint transfer than a neglected one.
Identifying the type and severity of the paint transfer is crucial in determining the best course of action. Minor transfer might be easily removed with a simple cleaning solution, while more severe cases may require more aggressive methods like using a clay bar or even light polishing.
Essential Tools and Materials for Removing Paint Transfer
Having the right tools and materials on hand is half the battle. Here's a checklist of essential items you'll likely need:
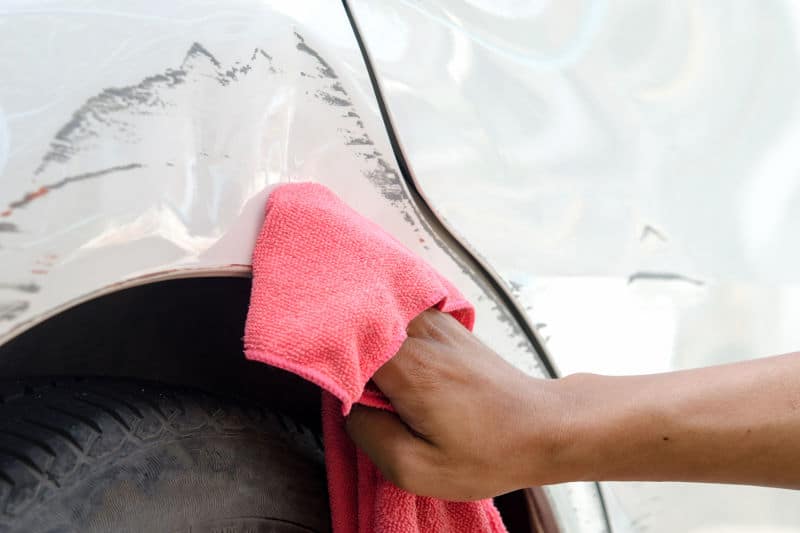
- Microfiber Towels: Invest in high-quality, soft microfiber towels. Avoid using paper towels or abrasive cloths, as they can scratch your car's paint.
- Car Wash Soap: Use a dedicated car wash soap specifically formulated for automotive paint. Dish soap can strip away wax and damage the clear coat over time.
- Detailing Spray or Quick Detailer: This helps lubricate the surface and makes it easier to remove contaminants without scratching.
- Clay Bar: A clay bar is a detailing tool that helps remove embedded contaminants and paint transfer. It works by gently grabbing onto and lifting the foreign material from the paint surface.
- Clay Bar Lubricant: Essential when using a clay bar to prevent it from scratching your paint. You can use a dedicated clay bar lubricant or detailing spray.
- Polishing Compound (Optional): For more stubborn paint transfer, a mild polishing compound may be necessary.
- Dual Action (DA) Polisher (Optional): If you choose to use a polishing compound, a DA polisher can make the process much easier and more effective.
- Wax or Sealant: After removing the paint transfer, it's crucial to protect the exposed paint with a fresh coat of wax or sealant.
- Gloves: To protect your hands from chemicals and contaminants.
- Good Lighting: Working in a well-lit area is crucial for seeing the paint transfer clearly and ensuring you remove it effectively.
Steps to Remove Paint Transfer From Your Car
Now, let's get down to the process of how to remove paint transfer from car. Follow these steps carefully, and remember to always test any product or technique in an inconspicuous area first.
Step 1: Wash and Dry the Affected Area
Begin by thoroughly washing the affected area with car wash soap and water. This removes any loose dirt and debris that could scratch the paint during the removal process. Rinse the area thoroughly and dry it with a clean microfiber towel. Ensure the area is completely dry before proceeding to the next step.
Step 2: Apply Detailing Spray and Inspect the Damage
Spray the affected area with detailing spray or quick detailer. This will lubricate the surface and help loosen the paint transfer. Carefully inspect the area to assess the severity of the transfer. If the paint transfer is minimal and only on the surface, you might be able to remove it with just the detailing spray and a microfiber towel. Gently rub the area with the microfiber towel, using light to moderate pressure. Check the towel frequently for paint transfer.
Step 3: Using a Clay Bar to Remove Paint Transfer
If the detailing spray isn't enough, it's time to break out the clay bar. This is a highly effective way to remove embedded contaminants and paint transfer. Here's how to use it:
- Knead the Clay Bar: Take a piece of the clay bar (about the size of a golf ball) and knead it in your hands until it becomes soft and pliable.
- Flatten the Clay Bar: Flatten the clay bar into a disc shape.
- Lubricate the Area: Generously spray the affected area with clay bar lubricant or detailing spray. Keep the surface well-lubricated throughout the process.
- Gently Glide the Clay Bar: Gently glide the clay bar over the lubricated surface, using light pressure. Move the clay bar in a back-and-forth or up-and-down motion. You'll feel the clay bar picking up contaminants and paint transfer.
- Fold and Re-Knead: As the clay bar picks up contaminants, it will become dirty. Fold the clay bar over on itself to expose a clean surface. Knead the clay bar again to redistribute the contaminants.
- Repeat: Continue gliding the clay bar over the area, lubricating frequently and folding/re-kneading the clay bar as needed, until the surface feels smooth and the paint transfer is gone.
- Wipe Clean: Once you've finished claying, wipe the area clean with a microfiber towel.
Important Tip: Never use a clay bar on a dry surface. Always keep the area well-lubricated to prevent scratching the paint. If you drop the clay bar on the ground, discard it. It may have picked up abrasive particles that could damage your paint.
Step 4: Polishing (If Necessary)
In some cases, using a clay bar alone might not completely remove all traces of paint transfer, or it may leave behind slight imperfections. If this happens, you can use a polishing compound to further refine the surface. This step is best done with a Dual Action (DA) polisher for the safest and most effective results, but can be done by hand with patience.
- Apply Polishing Compound: Apply a small amount of polishing compound to a polishing pad (appropriate for your machine).
- Polish the Area: Using a DA polisher with light to moderate pressure, polish the affected area. Work in small sections, overlapping each pass. Follow the instructions that come with your specific polishing compound.
- Wipe Clean: After polishing, wipe the area clean with a microfiber towel.
Caution: Polishing removes a thin layer of clear coat, so it's important to use a mild polishing compound and avoid over-polishing. If you're not comfortable using a polisher, it's best to consult a professional detailer.
Step 5: Wax or Sealant Protection
After removing the paint transfer and polishing (if necessary), it's crucial to protect the exposed paint with a fresh coat of wax or sealant. This will help prevent future paint transfer and protect the paint from the elements.
- Apply Wax or Sealant: Follow the instructions on your chosen wax or sealant. Typically, you'll apply a thin, even layer to the paint surface.
- Let it Cure: Allow the wax or sealant to cure according to the manufacturer's instructions.
- Buff Off: Buff off the excess wax or sealant with a clean microfiber towel.
Preventing Future Paint Transfer on Your Car
While knowing how to remove paint transfer from car is helpful, preventing it in the first place is even better. Here are some tips to minimize the risk of paint transfer:
- Maintain a Safe Following Distance: Give yourself plenty of room when driving behind other vehicles to avoid collisions.
- Be Careful in Parking Lots: Parking lots are notorious for bumps and scrapes. Park in well-lit areas away from other cars, if possible.
- Protect Your Car's Paint: Regularly wax or seal your car's paint to provide a protective layer against paint transfer and other contaminants. A ceramic coating is an even better form of protection.
- Consider Paint Protection Film (PPF): PPF is a clear, self-healing film that can be applied to your car's paint to protect it from scratches, chips, and paint transfer.
- Be Mindful of Your Surroundings: Pay attention to your surroundings when driving or parking, and be aware of potential hazards like poles, walls, and other vehicles.
When to Seek Professional Help
While many cases of paint transfer can be handled with DIY methods, there are certain situations where it's best to seek professional help from an auto detailing shop or body shop. These include:
- Severe Paint Transfer: If the paint transfer is extensive and deeply embedded, a professional may have the expertise and equipment to remove it safely and effectively.
- Damage to the Clear Coat: If the impact caused damage to the clear coat or underlying paint, a professional can repair the damage and repaint the affected area.
- If You're Not Comfortable: If you're not comfortable performing the paint transfer removal yourself, it's best to leave it to the professionals to avoid causing further damage to your car's paint.
Removing paint transfer from your car can be a satisfying DIY project. By understanding the nature of paint transfer, using the right tools and techniques, and taking preventative measures, you can keep your car looking its best. If you ever feel overwhelmed or unsure, don't hesitate to seek professional help. Happy detailing!